Digital signatures are only useful if someone verifies them. A signed document that nobody checks provides no security — it is like having a burglar alarm that nobody monitors. Verification is the process of confirming that a signature is valid: that the message was signed by the claimed sender and that the message has not been modified since signing.
This guide walks through the verification process step by step, using both browser-based tools and the OpenSSL command line, and explains what to do when verification fails.
How Digital Signature Verification Works
Before diving into the practical steps, it helps to understand what happens under the hood. Digital signature verification is a three-input process:
1. **The original data** (the message, file, or document that was signed) 2. **The signature** (the cryptographic value produced by the signing process) 3. **The public key** (the signer's public key, or a certificate containing it)
The verification algorithm performs these steps:
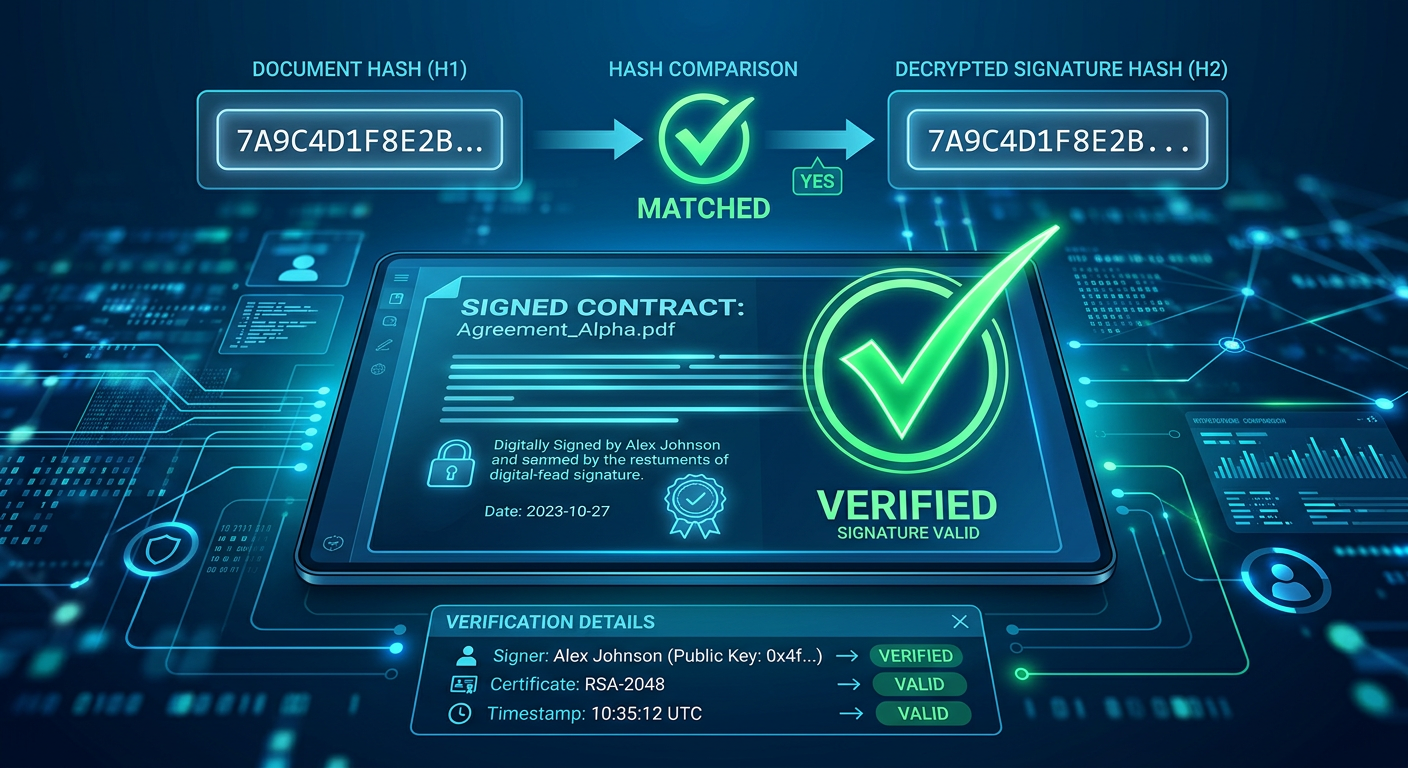
1. It hashes the original data using the same hash function used during signing (typically SHA-256). 2. It uses the public key to perform a mathematical operation on the signature, recovering the hash that was embedded in the signature during signing. 3. It compares the two hashes. If they match, the signature is valid. If they differ, the signature is invalid.
If the data was modified even by a single bit, the hash will be completely different, and verification will fail. If the signature was created with a different private key, the recovered hash will not match, and verification will fail. This is why digital signatures provide both authenticity (proof of who signed) and integrity (proof that the data was not modified).
For background on how signatures are created, read our digital vs electronic signatures guide and our Ed25519 vs RSA comparison.
Method 1: Verifying a Signature in the Browser
NovelCrypt's digital signer tool lets you create and verify digital signatures entirely in your browser, without installing any software. Here is how to verify a signature:
### Step 1: Obtain the Three Inputs
You need: - The original message or file that was signed - The signature value (a base64 or hex string produced by the signing process) - The signer's public key (a PEM-format key string)
The signer should provide all three through a secure channel. The public key can also be obtained from a digital certificate if one is available.
### Step 2: Open the Digital Signer Tool
Navigate to the digital signer tool. Select the "Verify" tab or mode.
### Step 3: Enter the Inputs
1. Paste the original message into the message field, or upload the original file. 2. Paste the signature value into the signature field. 3. Paste the public key into the public key field, or upload the public key file.
### Step 4: Click Verify
The tool will perform the verification and display one of two results:
- **Signature valid:** The message was signed by the holder of the private key corresponding to the provided public key, and the message has not been modified. - **Signature invalid:** The message was modified, the signature was created with a different key, or the signature format is incorrect. Do not trust the message.
The tool performs all cryptographic operations in your browser using the Web Crypto API. No data is sent to any server. This means the verification is private and cannot be intercepted.
Method 2: Verifying a Signature with OpenSSL
For command-line verification, OpenSSL is the standard tool. Here is how to verify a signature step by step.
### Step 1: Prepare Your Files
You need three files: - `data.txt` — the original data that was signed - `signature.bin` — the signature (binary format) - `publickey.pem` — the signer's public key in PEM format
### Step 2: Verify the Signature
```bash openssl dgst -sha256 -verify publickey.pem -signature signature.bin data.txt ```
If the signature is valid, OpenSSL outputs: ``` Verified OK ```
If the signature is invalid, OpenSSL outputs: ``` Verification failure ```
### Step 3: Verify a Signature from a Certificate
If the signer used a certificate (not a raw public key), extract the public key first:
```bash # Extract public key from certificate openssl x509 -in certificate.pem -pubkey -noout > publickey.pem
# Then verify openssl dgst -sha256 -verify publickey.pem -signature signature.bin data.txt ```
### Step 4: Verify an RSA-PSS Signature
RSA-PSS is the recommended RSA signature scheme (superior to PKCS#1 v1.5). To verify an RSA-PSS signature:
```bash openssl dgst -sha256 -verify publickey.pem -sigopt rsa_padding_mode:pss -sigopt rsa_pss_saltlen:32 -signature signature.bin data.txt ```
For more on RSA operations, see our RSA encryption explainer and try the RSA encrypt/decrypt tool.
Method 3: Verifying PGP Signatures
PGP signatures are common in software distribution. To verify a PGP signature:
### Step 1: Import the Signer's Public Key
```bash gpg --import sender.asc ```
Or fetch from a key server: ```bash gpg --recv-keys <key-id> ```
### Step 2: Verify the Signature
```bash gpg --verify message.sig message.txt ```
If valid, GPG outputs: ``` gpg: Good signature from "Sender Name <sender@example.com>" ```
Read our PGP encryption guide for more on PGP signatures and the web of trust.
What Happens When Verification Fails
Verification failure is not a bug — it is the system working correctly by rejecting something that does not verify. Here are the common causes:
### Cause 1: Data Tampering
The message or file was modified after signing. Even a single character change will cause the hash to differ. This is the primary security purpose of digital signatures: detecting tampering.
**Action:** Do not trust the modified data. Contact the signer through a separate channel and request a new signed copy.
### Cause 2: Wrong Public Key
You are using a public key that does not correspond to the private key that created the signature. This can happen if: - You have the wrong person's key - The signer regenerated their key pair - An attacker substituted a different key
**Action:** Obtain the correct public key from a trusted source. If using certificates, verify the certificate chain with the methods described in our digital certificate guide.
### Cause 3: Expired or Revoked Certificate
The certificate containing the public key has expired or been revoked. The signature may have been valid when created, but the certificate is no longer trustworthy.
**Action:** Check the certificate's validity period and revocation status. If the certificate is expired, obtain a new certificate from the signer. If revoked, do not trust the signature.
### Cause 4: Algorithm Mismatch
The signature was created with a different algorithm than you are using for verification. For example, the signature was created with RSA-PSS but you are verifying with PKCS#1 v1.5, or the hash function differs (SHA-256 vs SHA-512).
**Action:** Check the signature metadata to determine the algorithm used. In OpenSSL, use `openssl pkeyutl` with the correct parameters.
### Cause 5: Signature Format Error
The signature data is corrupted or in an unexpected format. This can happen with encoding issues (base64 vs binary, PEM vs DER).
**Action:** Verify the signature format. Decode base64 signatures before passing them to OpenSSL, or use the appropriate flag.
Troubleshooting Flowchart
``` Signature verification failed | v Is the data exactly the same as when it was signed? YES -> Check public key NO -> Data was tampered. Do not trust. | v Is the public key from the correct sender? YES -> Check certificate status NO -> Obtain correct public key | v Is the certificate valid (not expired/revoked)? YES -> Check algorithm NO -> Get new certificate | v Are signature algorithm and hash function correct? YES -> Check format NO -> Use correct algorithm parameters | v Is the signature format correct (encoding, binary vs base64)? YES -> Contact signer through separate channel NO -> Convert format and retry ```
Verifying Code Signatures
Software packages are often signed to verify their authenticity:
### Linux Packages
```bash # Verify an APT package signature apt-get verify package.deb
# Verify a GPG-signed package gpg --verify package.sig package.tar.gz ```
### Git Commits
```bash # Verify a signed Git commit git verify-commit <commit-hash>
# Verify a signed tag git tag -v <tag-name> ```
### TLS Certificates
When you visit an HTTPS website, your browser automatically verifies the server's certificate. To manually verify:
```bash openssl s_client -connect novelcrypt.com:443 -showcerts ```
Best Practices for Signature Verification
1. **Always verify signatures.** A signed document that is not verified provides no security. Make verification a routine step, not an optional one.
2. **Verify the public key independently.** A signature is only as trustworthy as the public key you verify it with. Obtain public keys through a trusted channel — a certificate authority, a key server with verification, or an in-person key exchange.
3. **Do not trust modified data.** If verification fails due to data modification, do not attempt to "fix" the data. Request a new signed copy from the original sender.
4. **Use the correct algorithm.** Ensure your verification tool uses the same signature algorithm and hash function as the signer. Mismatches cause false failures.
5. **Check certificate validity.** When verifying with a certificate, check the validity period and revocation status. An expired certificate does not necessarily mean the signature is invalid, but it reduces trust.
6. **Use authenticated encryption when possible.** For modern systems, AES-GCM provides both encryption and authentication in one operation, which is simpler than separate signing and encryption. Learn more in our AES-256-GCM explainer and try the AES text encryptor.
The Bottom Line
Verifying a digital signature is a three-input process: the original data, the signature, and the public key. The verification algorithm hashes the data, recovers the hash from the signature using the public key, and compares them. A match confirms authenticity and integrity. A mismatch indicates tampering, a wrong key, an expired certificate, or an algorithm mismatch. NovelCrypt's digital signer tool lets you verify signatures in the browser, while OpenSSL provides command-line verification. The most important practice is simple: always verify signatures. An unverified signature is just a decoration.